Advertisemen
Introduction:
Previously we learned XML parsing in Xamarin.Forms. And this article demonstrates how to consume a RESTful web service and how to parse the JSON response from a Xamarin.Forms application.


Previously we learned XML parsing in Xamarin.Forms. And this article demonstrates how to consume a RESTful web service and how to parse the JSON response from a Xamarin.Forms application.

Requirements:
- This article source code is prepared by using Visual Studio 2017 Enterprise. And it is better to install latest visual studio updates from here.
- This article is prepared on a Windows 10 machine.
- This sample project is Xamarin.Forms PCL project.
- This sample app is targeted for Android, iOS & Windows 10 UWP. And tested for Android & UWP only. Hope this sample source code would work for iOS as well.
Description:
This article can explain you below topics:
1. How to create Xamarin.Forms PCL project with Visual studio 2017?
2. How to check network status from Xamarin.Forms app?
3. How to consuming webservice from Xamarin.Forms?
4. How to parse JSON string?
5. How to bind JSON response to ListView?
Let's learn how to use Visual Studio 2017 to create Xamarin.Forms project.
1. How to create Xamarin.Forms PCL project with Visual studio 2017?
Before to consume webservice, first we need to create the new project.
- Launch Visual Studio 2017/2015.
- On the File menu, select New > Project.
- The New Project dialog appears. The left pane of the dialog lets you select the type of templates to display. In the left pane, expand Installed > Templates > Visual C# > Cross-Platform. The dialog's center pane displays a list of project templates for Xamarin cross platform apps.
- In the center pane, select the Cross Platform App (Xamarin.Forms or Native) template. In the Name text box, type "RestDemo". Click OK to create the project.

- And in next dialog, select Blank App=>Xamarin.Forms=>PCL.The selected App template creates a minimal mobile app that compiles and runs but contains no user interface controls or data. You add controls to the app over the course of this tutorial.

- Next dialog will ask for you to confirm that your UWP app support min & target versions. For this sample, I target the app with minimum version 10.0.10240 like below:


2. How to check network status from Xamarin.Forms app?
Before call webservice, first we need to check internet connectivity of a device, which can be either mobile data or Wi-Fi. In Xamarin.Forms, we are creating cross platform apps, so the different platforms have different implementations.
So to check the internet connection in Xamarin.Forms app, we need to follow the steps given below.
Step 1:
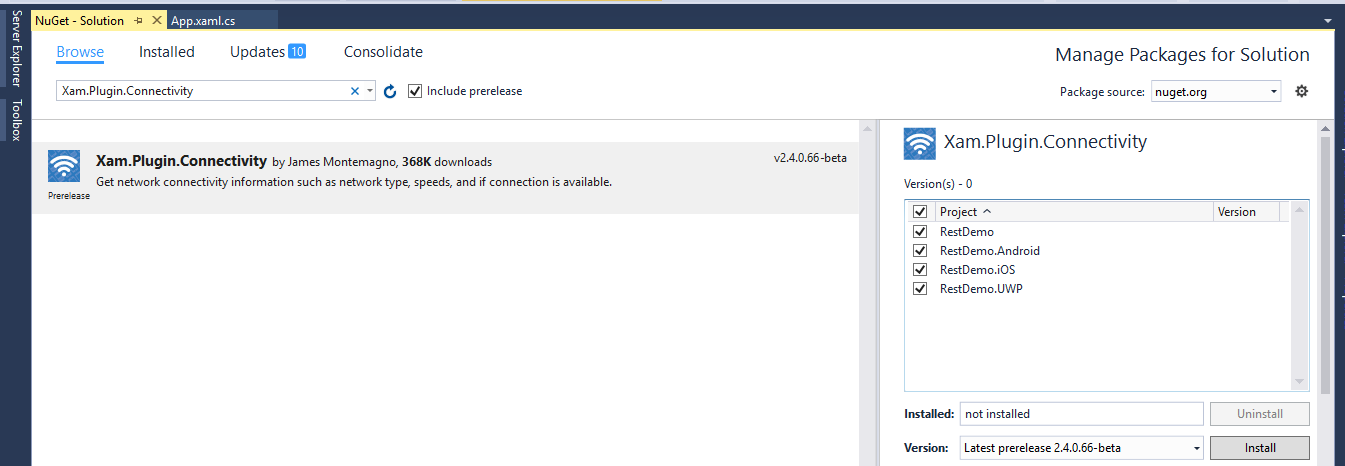
Go to solution explorer and right click on your solution=>Manage NuGet Packages for solution.

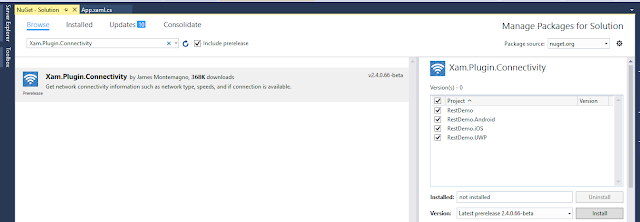

Now search for Xam.Plugin.Connectivity NuGet package. On the right side, make sure select all platform projects and install it.
Step 2:
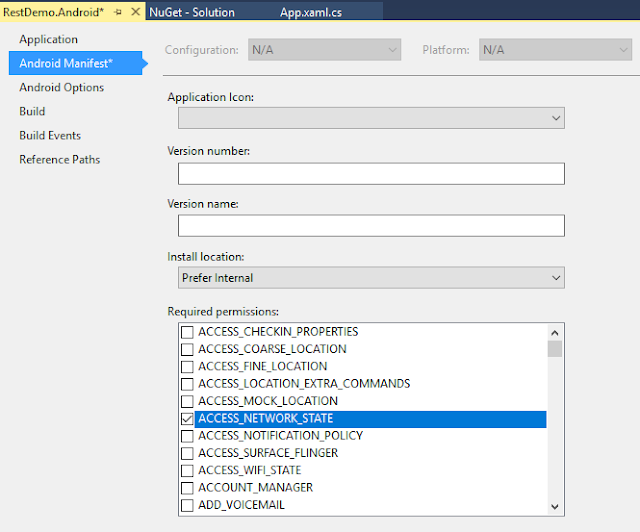
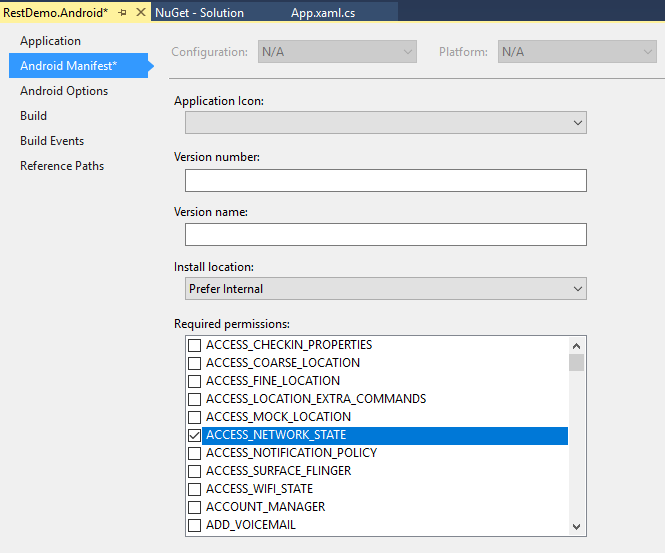
In Android platform, you have to allow the user permission to check internet connectivity. For this, use the steps given below.
Right click on RestDemo.Android Project and select Properties => Android Manifest option. Select ACCESS_NETWORK_STATE and INTERNET permission under Required permissions.
Step 3:
Create a class name "NetworkCheck.cs", and here I placed it in the Model folder. After creating a class, add below method to find network status.
- namespace RestDemo.Model
- {
- public class NetworkCheck
- {
- public static bool IsInternet()
- {
- if (CrossConnectivity.Current.IsConnected)
- {
- return true;
- }
- else
- {
- // write your code if there is no Internet available
- return false;
- }
- }
- }
- }
3. How to consuming webservice from Xamarin.Forms?
We can consume webservice in Xamarin using HttpClient. But it is not directly available, and so we need to add "Microsoft.Net.Http" from Nuget.
Step 1: Go to solution explorer and right click on your solution=>Manage NuGet Packages for a solution => search for Microsoft.Net.Http NuGet Package=>on the right side, make sure select all platform projects and install it.

Note: To add "Microsoft.Net.Http", you must install "Microsoft.Bcl.Build" from Nuget. Otherwise, you will get an error like "Could not install package 'Microsoft.Bcl.Build 1.0.14'. You are trying to install this package into a project that targets 'Xamarin.iOS,Version=v1.0', but the package does not contain any assembly references or content files that are compatible with that framework."

Step 2:
Now it is time to use HttpClient for consuming webservice and before that we need to check the network connection. Please note that In below code you need to replace your URL, or you can also find the demo webservice url from the source code given below about this article.
- public async void GetJSON()
- {
- // Check network status
- if (NetworkCheck.IsInternet())
- {
- var client = new System.Net.Http.HttpClient();
- var response = await client.GetAsync("REPLACE YOUR JSON URL");
- string contactsJson = await response.Content.ReadAsStringAsync(); //Getting response
- }
- }
4. How to parse JSON response string in Xamarin.Forms?
Generally, we will get a response from webservice in the form of XML/JSON. And we need to parse them to show them on mobile app UI. Let's assume, in the above code we will get below sample JSON response which is having a list of contacts.
- {
- "contacts": [{
- "id": "c200",
- "name": "Ravi Tamada",
- "email": "ravi@gmail.com",
- "address": "xx-xx-xxxx,x - street, x - country",
- "gender": "male",
- "phone": {
- "mobile": "+91 0000000000",
- "home": "00 000000",
- "office": "00 000000"
- }
- }]
- }
So to parse above JSON, we need to follow steps below:
Step 1: First we need to generate the C#.net class for JSON response string. So I am using http://json2csharp.com/ for simply building a C# class from a JSON string. And it's very important is to make the class members as similar to JSON objects otherwise you will never parse JSON properly. Finally, I generate below the C# root class name is "ContactList"
- using System;
- using System.Collections.Generic;
- using System.Linq;
- using System.Text;
- using System.Threading.Tasks;
- namespace RestDemo.Model
- {
- public class Phone
- {
- public string mobile { get; set; }
- public string home { get; set; }
- public string office { get; set; }
- }
- public class Contact
- {
- public string id { get; set; }
- public string name { get; set; }
- public string email { get; set; }
- public string address { get; set; }
- public string gender { get; set; }
- public Phone phone { get; set; }
- }
- public class ContactList
- {
- public List<Contact> contacts { get; set; }
- }
- }
Step 2: In Xamarin, we need to add "Newtonsoft.Json" Nuget package to parse JSON string. So to add Newtonsoft.Json, go to solution explorer and right click on your solution=>select Manage NuGet Packages for a solution => search for Newtonsoft.Json NuGet Package=>on the right side, make sure select all platform projects and install it.

Step 3: And finally, write below code to parse above JSON response.
- public async void GetJSON()
- {
- //Check network status
- if (NetworkCheck.IsInternet())
- {
- var client = new System.Net.Http.HttpClient();
- var response = await client.GetAsync("REPLACE YOUR JSON URL");
- string contactsJson = await response.Content.ReadAsStringAsync();
- ContactList ObjContactList = new ContactList();
- if (contactsJson != "")
- {
- //Converting JSON Array Objects into generic list
- ObjContactList = JsonConvert.DeserializeObject<ContactList>(contacts);
- }
- //Binding listview with server response
- listviewConacts.ItemsSource = ObjContactList.contacts;
- }
- else
- {
- await DisplayAlert("JSONParsing", "No network is available.", "Ok");
- }
- //Hide loader after server response
- ProgressLoader.IsVisible = false;
- }
5. How to bind JSON response to ListView?
Generally, it is very common scenario is showing a list of items in ListView from the server response.
Let's assume we have below JSON response from the server via webservice.
- {
- "contacts": [{
- "id": "c200",
- "name": "Ravi Tamada",
- "email": "ravi@gmail.com",
- "address": "xx-xx-xxxx,x - street, x - country",
- "gender": "male",
- "phone": {
- "mobile": "+91 0000000000",
- "home": "00 000000",
- "office": "00 000000"
- }
- },
- {
- "id": "c201",
- "name": "Johnny Depp",
- "email": "johnny_depp@gmail.com",
- "address": "xx-xx-xxxx,x - street, x - country",
- "gender": "male",
- "phone": {
- "mobile": "+91 0000000000",
- "home": "00 000000",
- "office": "00 000000"
- }
- },
- {
- "id": "c202",
- "name": "Leonardo Dicaprio",
- "email": "leonardo_dicaprio@gmail.com",
- "address": "xx-xx-xxxx,x - street, x - country",
- "gender": "male",
- "phone": {
- "mobile": "+91 0000000000",
- "home": "00 000000",
- "office": "00 000000"
- }
- }
- ]
- }
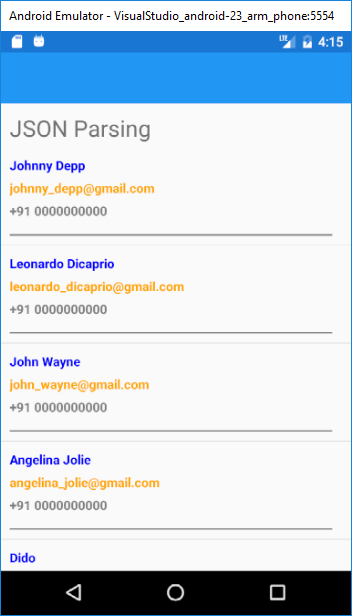
See there is 3 different items in above JSON response and if we want to plan for showing them in ListView first we need to add below Xaml code in your ContentPage(JsonParsingPage.xaml).
- <?xml version="1.0" encoding="utf-8" ?>
- <ContentPage xmlns="http://xamarin.com/schemas/2014/forms"
- xmlns:x="http://schemas.microsoft.com/winfx/2009/xaml"
- x:Class="RestDemo.Views.JsonParsingPage">
- <Grid>
- <Grid>
- <Grid.RowDefinitions>
- <RowDefinition Height="Auto"/>
- <RowDefinition Height="*"/>
- </Grid.RowDefinitions>
- <Label Grid.Row="0" Margin="10" Text="JSON Parsing" FontSize="25" />
- <ListView x:Name="listviewConacts" Grid.Row="1" HorizontalOptions="FillAndExpand" HasUnevenRows="True" ItemSelected="listviewContacts_ItemSelected">
- <ListView.ItemTemplate>
- <DataTemplate>
- <ViewCell>
- <Grid HorizontalOptions="FillAndExpand" Padding="10">
- <Grid.RowDefinitions>
- <RowDefinition Height="Auto"/>
- <RowDefinition Height="Auto"/>
- <RowDefinition Height="Auto"/>
- <RowDefinition Height="Auto"/>
- </Grid.RowDefinitions>
- <Label Text="{Binding name}" HorizontalOptions="StartAndExpand" Grid.Row="0" TextColor="Blue" FontAttributes="Bold"/>
- <Label Text="{Binding email}" HorizontalOptions="StartAndExpand" Grid.Row="1" TextColor="Orange" FontAttributes="Bold"/>
- <Label Text="{Binding phone.mobile}" HorizontalOptions="StartAndExpand" Grid.Row="2" TextColor="Gray" FontAttributes="Bold"/>
- <BoxView HeightRequest="2" Margin="0,10,10,0" BackgroundColor="Gray" Grid.Row="3" HorizontalOptions="FillAndExpand" />
- </Grid>
- </ViewCell>
- </DataTemplate>
- </ListView.ItemTemplate>
- </ListView>
- </Grid>
- <ActivityIndicator x:Name="ProgressLoader" IsRunning="True"/>
- </Grid>
- </ContentPage>
See in above code there is a ListView which was binded with relevant properties (name, email, mobile) which was mentioned in our class name called Contact.cs.
Finally, we need to bind our ListView with list like below:(Please find which was already mentioned in the 4th section of GetXML method at 17th line)
- //Binding listview with server response
- listviewConacts.ItemsSource = ObjContactList.contacts;
Demo Screens from Android:
Demo Screens from Windows10 UWP:


You can directly work on below sample source code that is having the functionality of JSON parsing.
Note: If you are looking for XML parsing sample, please visit here.
FeedBack Note: Please share your thoughts, what you think about this post, Is this post really helpful for you? Otherwise, it would be very happy, if you have any thoughts for to implement this requirement in any other way? I always welcome if you drop comments on this post and it would be impressive.
Advertisemen
Tidak ada komentar:
Posting Komentar